Introduction
This document describes how to configure and integrate Cisco Meeting Server (CMS) Single Combined.
the services to configure are Call Bridge, Webadmin, Web Bridge, Extensible Messaging and Presence Protocol (XMPP) and Lightweight Directory Access Protocol (LDAP) integration
Prerequisites
Requirements
Cisco recomends that you have knowledge of these topics:
- Cisco Unified Communications Manager (CUCM)
- Active Directory (AD)
- Certificate Authority (CA)
- Secure File Transfer Protocol (SFTP) client
- Domain Name Service (DNS) server
Components Used
The information in this document is based on these software and hardware versions:
- CMS version 2.3.7
- CUCM version 11.5.1
- Google Chrome version 69.0.3497
- WinSCP version 5.7.7
- Windows Server 2012
The information in this document was created from the devices in a specific lab environment. All of the devices used in this document started with a cleared (default) configuration. If your network is live, make sure that you understand the potential impact of any command.
Configure
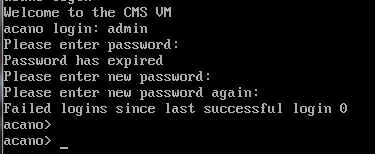
Step1. Access CMS
- The first time you Log in into CMS, the Welcome is shown in the screen and prompts to Log in
- The default credentials are:
User: admin
Password: admin
- After the credentiales are entered, the server asks you for a new password

- It is recommend that a new admin user is created, it is a good practice in case you lose the password for one account.
- Enter the command: user add <username> admin
- Enter a new password and confirm the new password

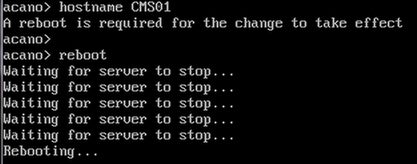
Step 2. Change the Hostname
- This change is optional
- Run the command hostname <name>
- Reboot the server
- Run the command reboot
Step 3. Configure network settings
- In order to display the current settings run the command ipv4 a
- Add ipv4 configuration
- Run the command ipv4 <interface> add <ipaddress>/<subnetmask> <gateway>

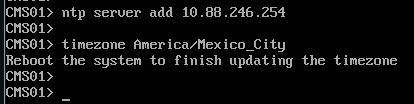
- Configure the time zone
- Run the command timezone <timezoneName>
- In order to see all the available timezones, Run the command timezone list
- Add a Network Time Protocol (NTP) sever
- Run the command ntp server add <ipaddress>
- Add a DNS server
- Run the command dns add forwardzone <domain> <dnsip>

Note: A specific domain can be configured for DNS lookup, however if any domain can be resolved by the DNS, then use a dot as the domain
Step 4. License the CMS
- In order to configure the CMS services, it requires a license to be installed
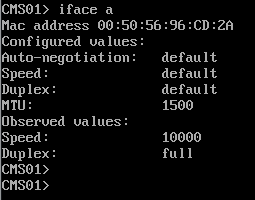
- In order to generate and install the license the Media Access Contol (MAC) address is required, since the licenses will be matched to it.
- Run the command iface a
- Copy the MAC address
- Contact your Sales representative so a license can be generated.
Note: The process to generate the license is out of the scope of this document.
- Once you have the license file, rename the file to cms.lic
- Use WinSCP or another SFTP client in order to upload the file into the CMS server
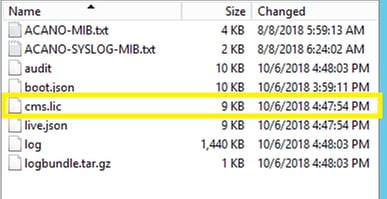
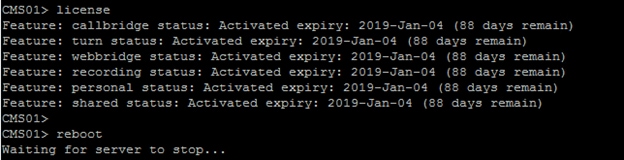
- Once the file is uploaded run the command license
- Reboot the server
- Run the command reboot
Step 5. Generate and install certificates
- Generate a Certificate Signing Request (CSR) for callbridge, webadmin, webbridge and xmpp
- Run the command pki csr <service> CN:<servicefqdn> for this purpose.

Note: In this example, a single certificate for each server is created, you can create one certificate for all the services. For more information about certificate creation, review the Certificate Creation Guide
- Two files are generated after running the command: .csr file and a .key file. with thename of the service you assigned on previous steps.
- Download the CSR files from the CMS server. Use WinSCP or other SFTP client for this purpose.

- Sign the CSR with a Certificate Authority
- Ensure to use a template that contains Web Client and Web Server Authentication
- Upload the signed certificate to the CMS server
- Ensure to upload the Root CA and any Intermediate certificate that had signed the certificates
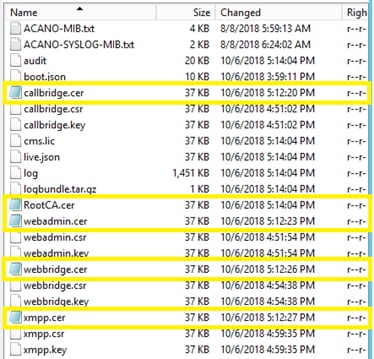
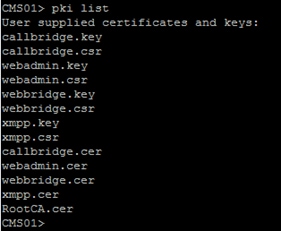
- In order to verify all the certificates are listed on CMS, run the command pki list
Step 6. DNS Records
- Create the DNS Address (A) records for callbridge, xmpp, webadmin and webbridge
- Ensure all records point to the CMS IP Address

- Create a Service Record (SRV) for xmpp-client
- The service record format is
| Service | _xmpp-client |
| Protocol | _tcp |
| Port | 5222 |
| Target | Enter the XMPP FQDN, for example xmpp.anmiron.local |

Step 7. Service Configuration
Configure the callbridge:
- Enter the command callbridge listen <interface>
- Enter the command callbridge certs <callbridge-key-file> <crt-file> [<cert-bundle>]
- The key-file is the key created when the CSR is created
- The cert-bundle is the bundle of the Root CA and any other intermediate certificate

Note: The Call Bridge listen interface must not be set on an interface that is configured to use Network Address Translation (NAT) to another IP address
Configure webadmin:
- Run the command webadmin listen <interface> <port>
- Run the command webadmin certs <key-file> <crt-file> [<cert-bundle>]

Note: If the webadmin and webbridge are configured in the same server, they must be configured on different interfaces or listen in different ports, the webbridge requires to listen in port 443. The webadmin is usually configured in port 445.
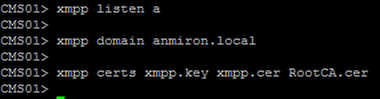
Configure XMPP:
- Run the command xmpp listen <interface whitelist>
- Run the command xmpp domain <domain name>
- Run the command xmpp certs <key-file> <crt-file> [<crt-bundle>]
Note: The domain name must match the domain where the DNS records were created.
Configure webbridge:
- Run the command webbridge listen <interface[:port] whitelist>
- Run the command webbridge certs <key-file> <crt-file> [<crt-bundle>]
- Run the command webbridge trust <crt-bundle>
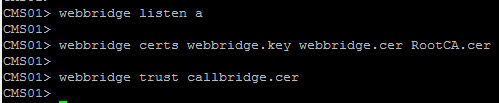
Note: The trust crt-bundle is the callbridge certificate and must be added to the webbridge in order for the callbridge to trust the webbridge, this will enable the Join as a Guest feature.
- Run the command callbridge restart
- Run the command wbeadmin enable
- Run the command xmpp enable
- Run the command webbridge enable
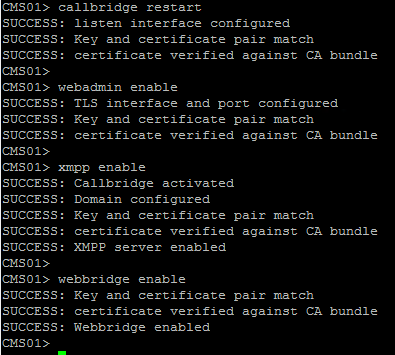
Note: The server must return SUCCESS for all the services, if it returns FAILURE, review the previous steps and validate all the configuration is correct
To allow the Call Bridge to access the XMPP service securely, it is necessary to provide a component name for the Call Bridge to use to authenticate with the XMPP service.
- Run the command xmpp callbridge add <component name>
- The result shows a Secret, as shown in the image
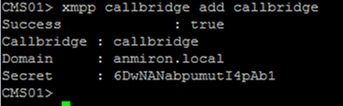
- Copy the Secret value
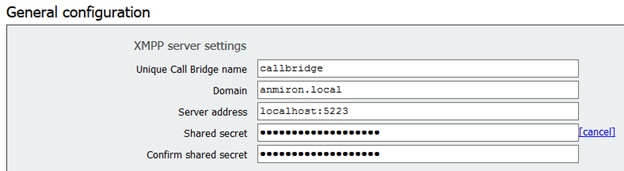
- Acess to the CMS web Interface
- Navigate to Configuration > General
- Enter the information
| Unique Call Bridge name | Enter the name of the created callbridge, for example callbridge |
| Domain | Enter the domain name, for example anmiron.local |
| Server address | Set the CMS IP address, for example localhost:5223 |
| Shared secret | Enter the Secret created in the previous step, for example 6DwNANabpumut14pAb1 |
- Select Submit
- Create an Incoming Call Matching Rule for Incoming calls
- Navigate to Configuration > Incoming calls
- Enter the information
| Domain | Enter the domain name of the CMS server, for example anmiron.local |
| Priority | Enter a value for the priority, for eaxmple 0 |
| Target Spaces | Select yes |

- Create a Space for test
- Navigate to Configuration > Spaces
- Enter the information
| Name | Enter a name for the space, for example spacetest |
| URI user part | Enter a URI for this space to be called, for example spacetest |
| Call ID | Enter the call ID to join this space from webbridge, for example spacetest |
| Passcode | Enter a number if to allow access to the space if it is required |

Note: The URI user part is what the callers need to dial at the domain configured on the Incoming Call Matching Rule, for example, the caller has to dial [email protected]
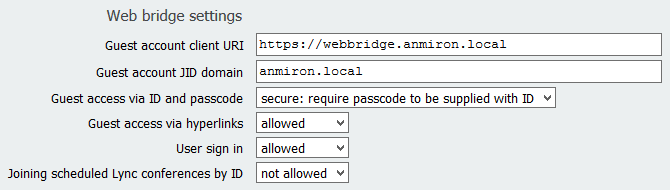
- Navigate to Configuration > General > Web bridge settings
- Enter the information
| Guest account client URI | This is the webbridge web interface, for example https://webbridge.anmiron.local |
| Guest Account JID domain | The configured domain in CMS, for example anmiron.local |
| Guest access via hyperlink | Select allowed |
Step 8. Integrate LDAP
- Open the CMS web interface
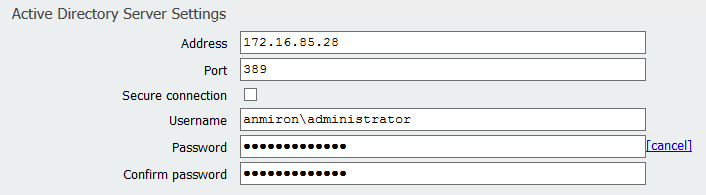
- Navigate to Configuration > Active Directory
- Enter the information
| Address | The LDAP server IP address, for example 172.16.85.28 |
| Port | This is 389 if you are using a non-secure connection and 636 if secure connection is required |
| Username | Enter an Administrator of LDAP server, for example anmiron\administrator |
| Password | Enter the password of the Administrator user |
| Base Distinguished name | This is a setting from Active directory, for example CN=Users, DC=anmiron, DC=local |
| Filter | This is a setting from Active directory, for example (memberof=CN=CMS, CN=Users, DC=anmiron, DC=local) |
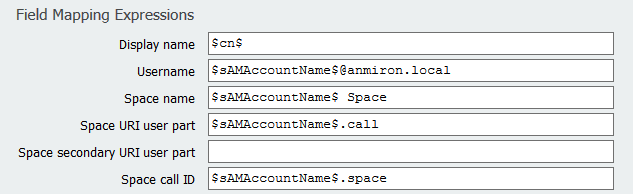
| Display Name | How the user name is shown, for example $cn$ |
| Username | The Log in ID for the user, for example [email protected] |
| Space Name | How the space is shown, for example $sAMAccountName$ Space |
| Space URI user part | The URI to be dialed, for example $sAMAccountName$.call |
| Space Call ID | The Call ID to be used from webbridge, for example $sAMAccountName$.space |

- Select Submit
- Select Sync now
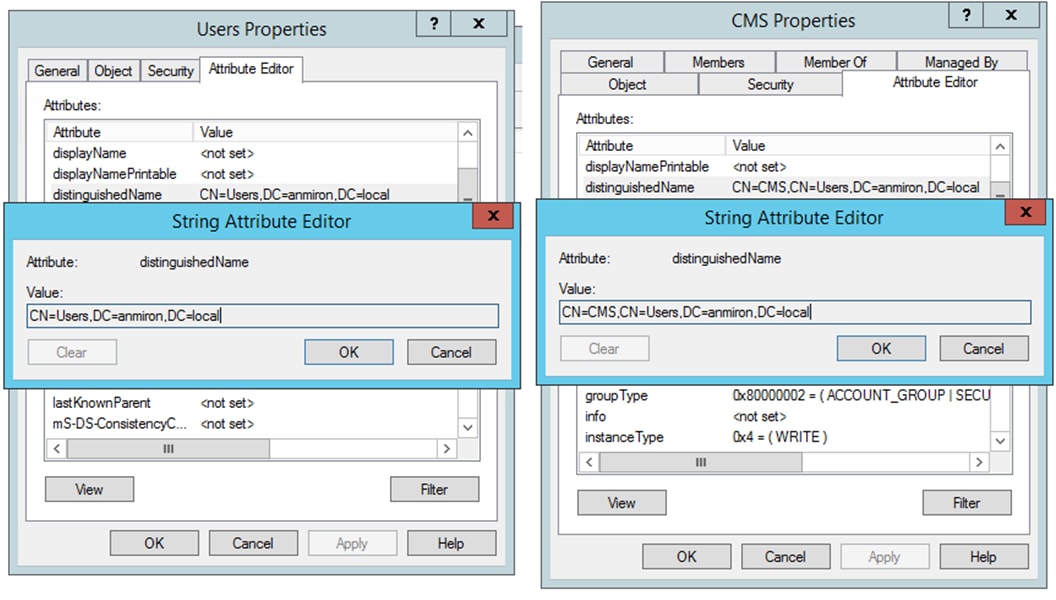
Base distinguished name and Filter are settings from the Active Directory. This example contains basic information to obtain the information with Attribute editor on Active Directory. In order to open the Attribute editor, enable Advanced Features on Active Directory. Navigate to Users and Computers > View and select Advanced Features
- For this example a group called CMS is created
- Open the Users and Computers feature on AD
- Select right one User and open the properties
- Navigate to Attribute Editor
- In the Attribute column find the distinguishedName field
Note: For more information in regards the LDAP filters, visit the CMS deployment Guide
Step 9. Configure CUCM
- Open the web interface of CUCM
- Navigate to Device > Trunks
- Select Add New
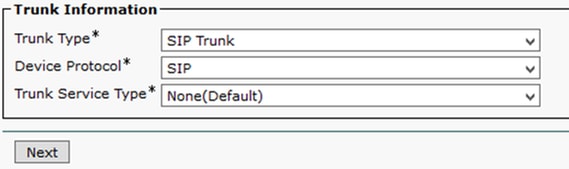
- In the Trunk Type drop-down menu select SIP Trunk
- Select Next
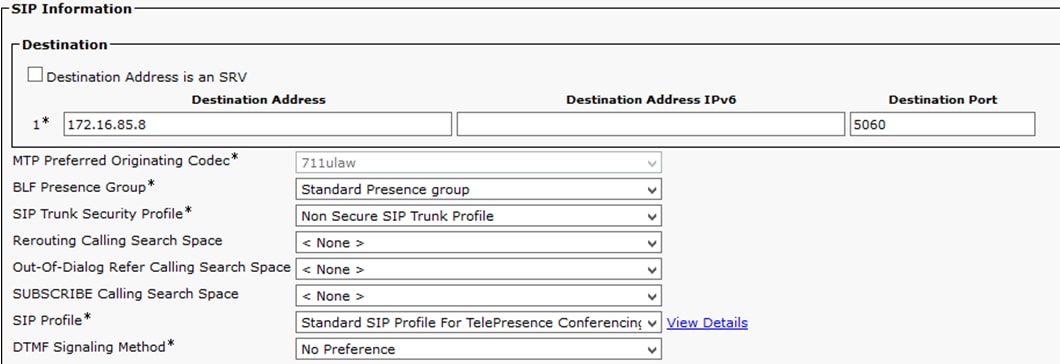
- Enter the information
| Device Name | Enter a name for the SIP Trunk, for example TrunktoCMS |
| Destination Address | Enter the CMS IP address or the Call Bridge FQDN, for example 172.16.85.8 |
| Destination Port | Enter the port where the CMS listens, for example 5060 |
| SIP Trunk Security Profile | Select the Secure Profile, for example Non Secure SIP Trunk Profile |
| SIP Profile | Select Standar SIP Profile for TelePresence Conferencing |
- Select Save
- Select Reset
- Navigate to Call routing > SIP Route pattern > Add New > Select Domain Routing
- Enter the information
| IPv4 Pattern | Enter the domain configured to CMS, for example anmiron.local |
| SIP Trunk/Route List | Select the previous created SIP Trunk, TrunktoCMS |

- Select Save
Verify
Callbridge and XMPP communication
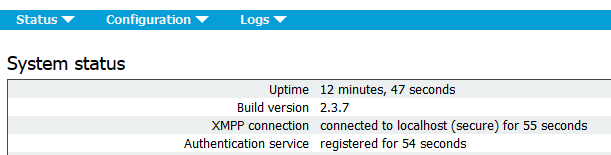
- Open the web interface of CMS
- Navigate to Status > General
- The XMPP connection status must be connected to localhost
- Make a call from a device registered on CUCM
- Dial the URI [email protected]
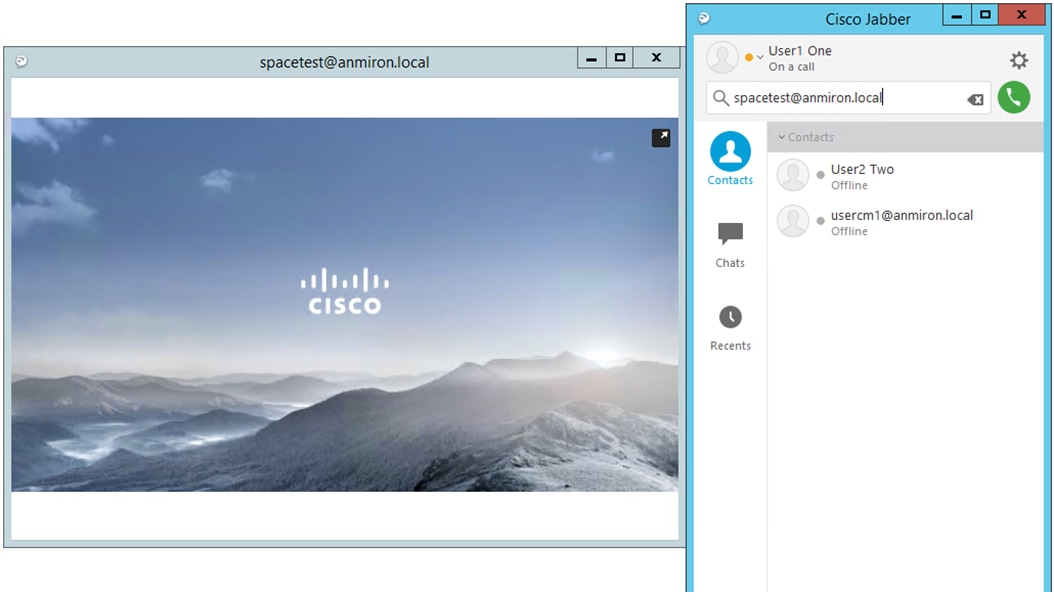
- Open the web interface of CMS
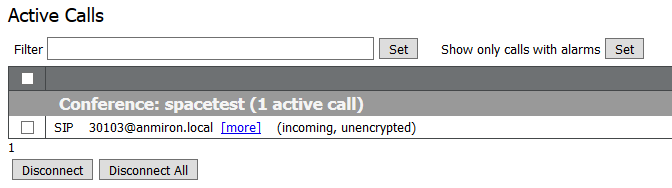
- Navigate to Status > Calls
- The call must be shown as Active Call
LDAP Syncronization with CMS
- Open the CMS web interface
- Navigate to Status > Users
- The complete list of users must be displayed

- Navigate to Configuration > Spaces
- Ensure that every user has its own space created

Access to Webbridge
- Use the Web Browser to access the web page configured for the webbridge service, https://webbridge.anmiron.local
- The page must shows two options Sign in and Join meeting

- The users previously integrated from AD must be able to Log in
- Select Sign in
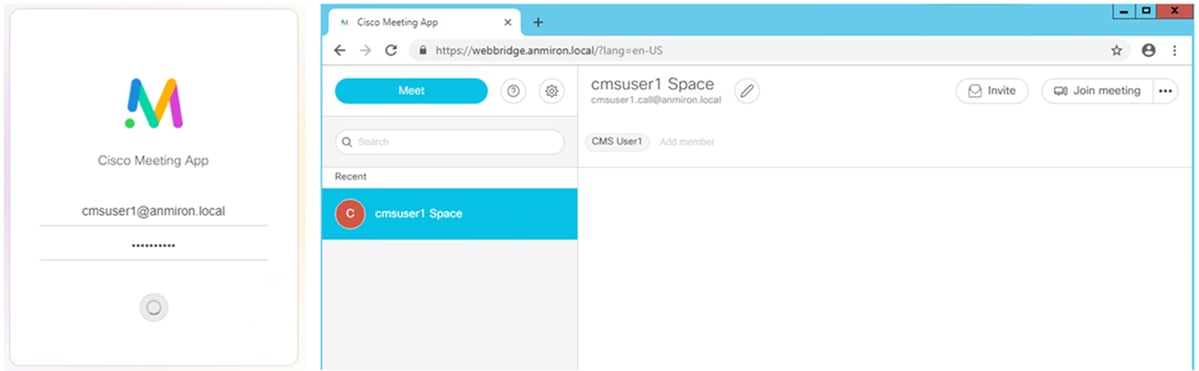
- Enter the Username and Password
- The user must be able to Log in, as shown in the image
Troubleshoot
There is currently no specific troubleshooting information available for this configuration.